
Hey there! This post contains affiliate links. Using my links means I earn a commission, which helps me create more rad content. More on affiliates here.
Today I’m going to be sharing the steps on how to sew a plus size corset! While I’m not a sewing blogger, I am a fashion designer! I’ve been working on my first collection for some time now, and I’ve kept my progress pretty tightly under wraps.
Buuuut I decided to share more progress pictures of one of the looks, mostly because I think corset making is SO SO FASCINATING.
This blog post is all about how to sew a plus size corset.
[Heads up! This post was originally published on November 24, 2019. It was last updated on August 16, 2023.]
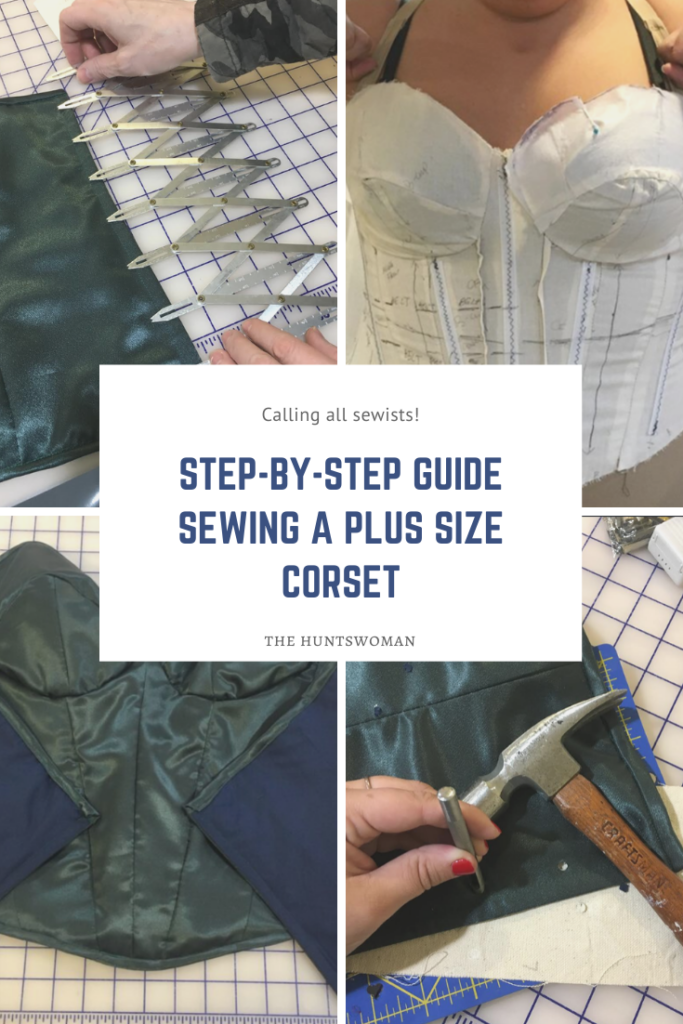
How to Sew a Plus Size Corset
Before we get started on specific steps, I wanted to make sure you have all of the supplies you need to sew your own plus size corset!
There are many many different versions of corset making, but I kept it pretty simple for this look.
Here’s my plus size corset shopping list:
- Pattern paper for drafting
- Muslin fabric for creating a mock-up or “toile” (45″ to 65″ wide)
- Transparent ruler
- Canvas [to add structure and body to the corset]
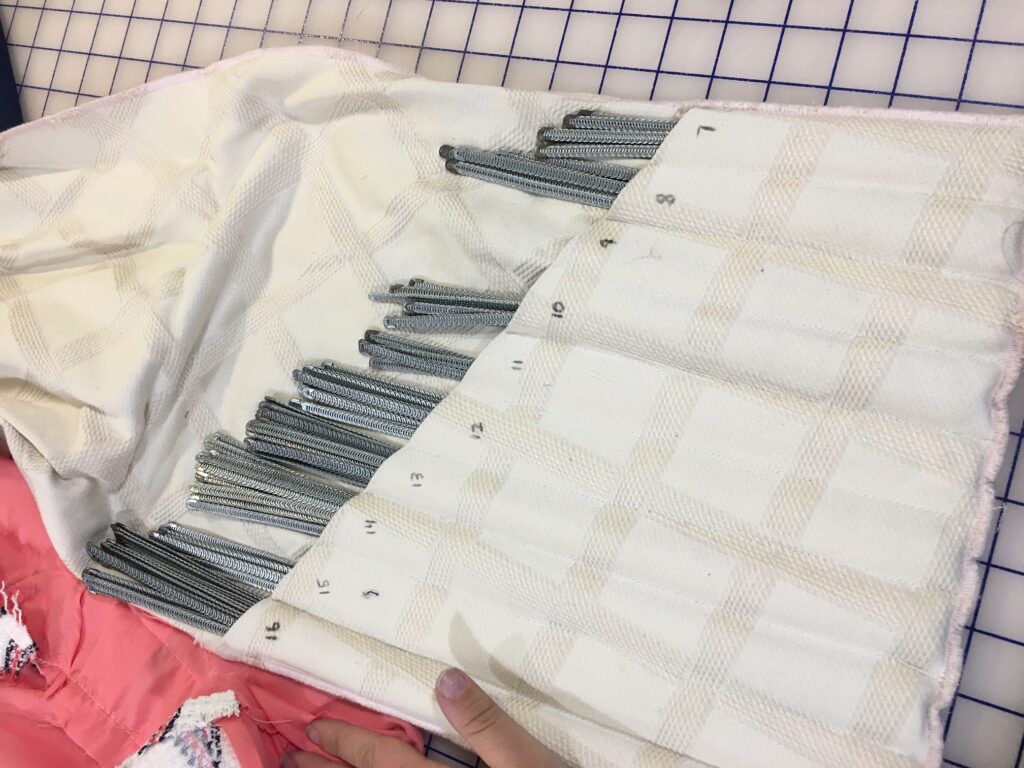
- Spiral Metal Boning
- Ridgilene (Plastic Boning)
- Flexible sewing gauge (for placing eyelets for the back lacing)
- White marking pencil
- Sewing gauge
- Grommet hole punching kit
- Outer Fabric (Your Choice)
- “No stretch” cotton for lining
- Grommets for lacing [like these ones here, your kit may come with these]
- Corset Lacing (100% cotton)
Corset Book Tutorial
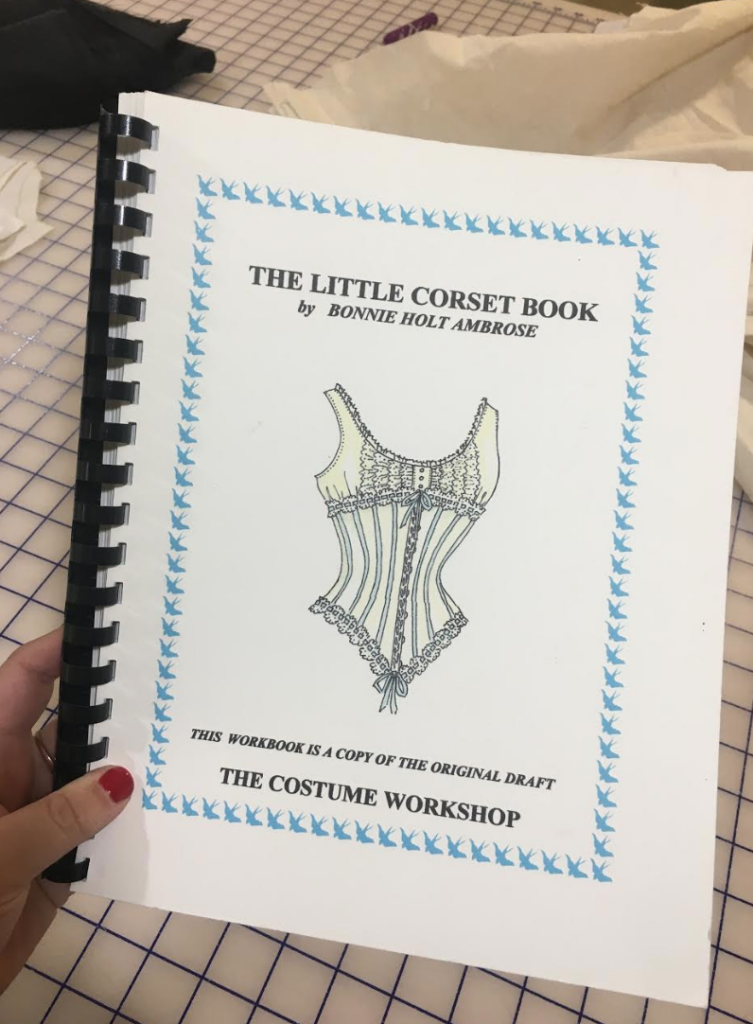
In addition to tools and supplies, I also use this helpful book! “The Little Corset Book” has helpful instructions and info!
Note: This Blog Post is Not an Exhaustive Sewng Tutorial
This blog post isn’t an exhaustive tutorial, but it does provide an inside look on how much dang work it takes to sew a custom corset! I wrote this blog post to help out other experienced sewists who want to learn of other corset sewing techniques.
If you’re new to sewing, a corset is NOT a good first project – they’re very complicated. If you have never sewn a formal gown, I would definitely sign up for sewing classes [and a corset making class] before tackling this fun project. Fun fact – I’ve taken a plus size corset making class in SLC, and I loved it! Totally worth the investment.
All in all, this project took about 20 hours.
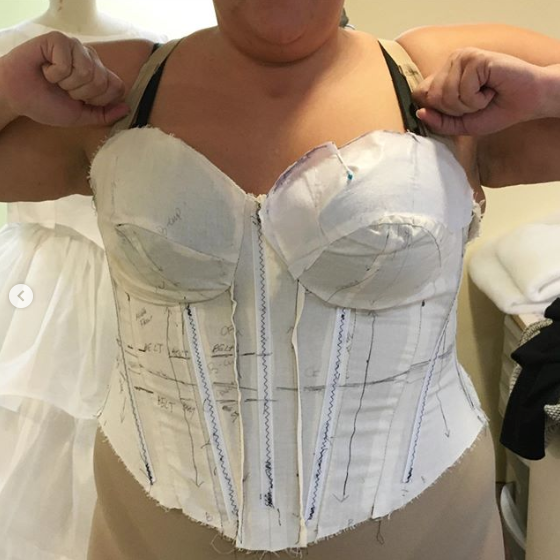
Step 1: Fitting the Muslin for a Plus Size Corset
I used a commercial corset pattern, and I expanded the pattern to fit my model. [This is a great online class on how to customize patterns for plus size bodies.]
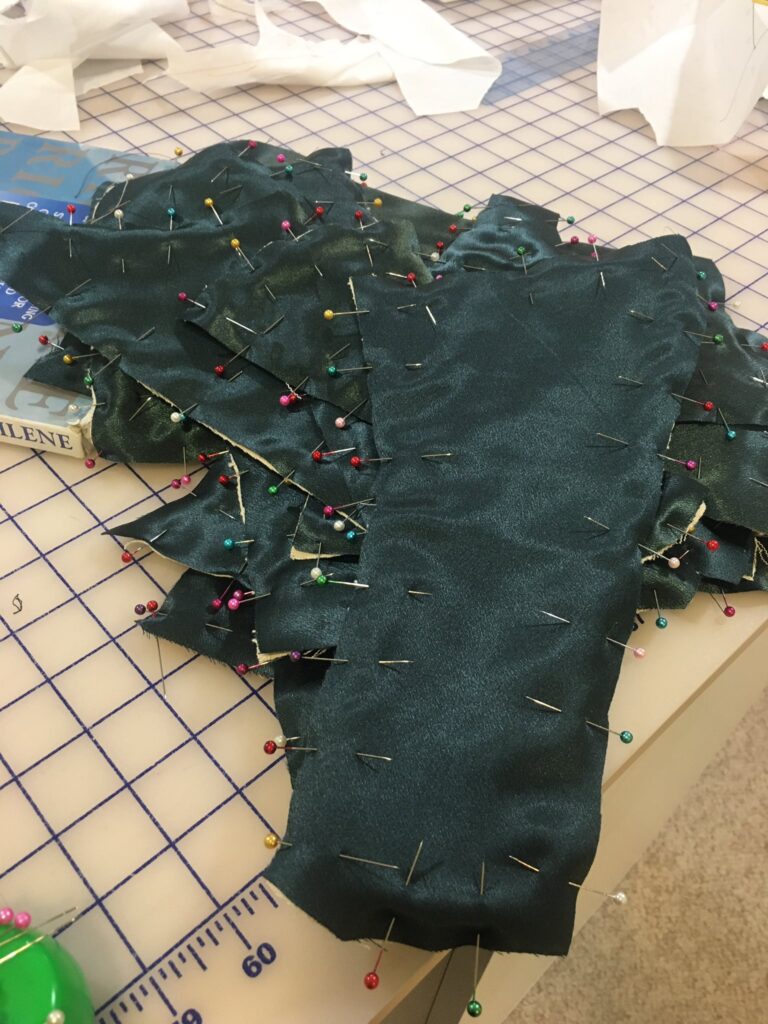
After you have drafted your pattern, you fit your muslin toile to the model. You want to be sure to note where there is excess fabric, and pin it out. Then, adjust your muslin (sewing where you’ve pinned out) to fit the model appropriately.
I had to add fabric at the bust cups to get the shape I wanted, using fusible interfacing to add fabric to then redraw the lines. I also marked the waistline of my model, to make sewing the final version easier.
Be sure to mark where you pin center back!
Step 2: Labeling FTW!
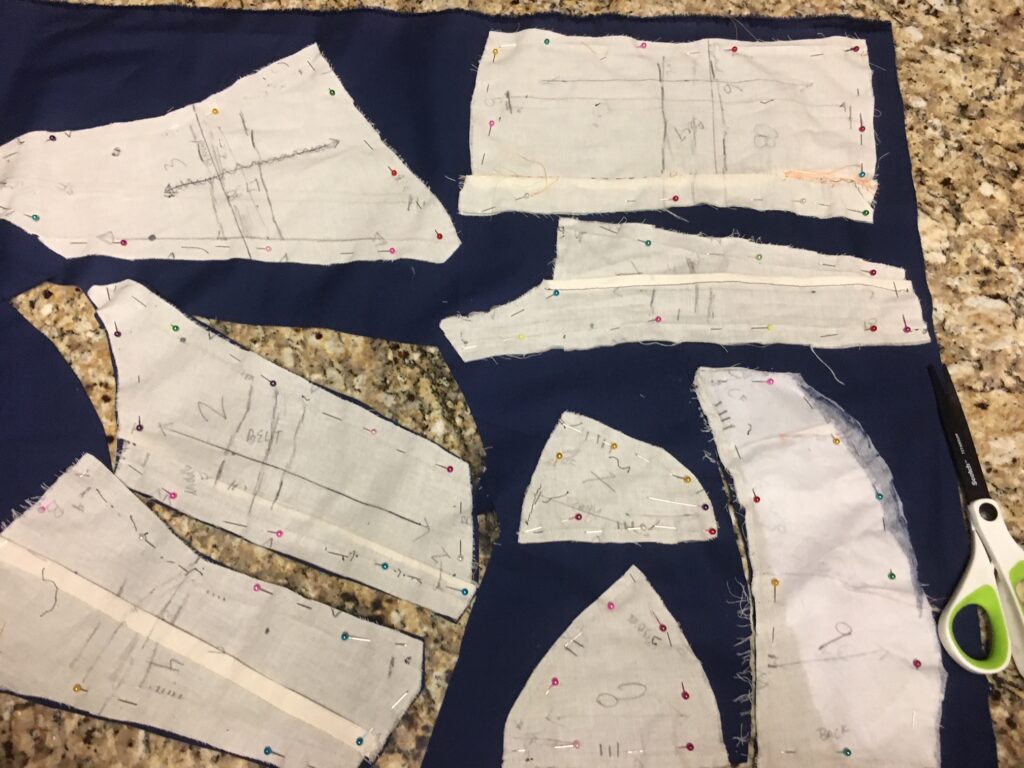
The next step to making a plus size corset is to take the muslin toile apart [woo seam rippers!], and then number each piece, from center front to center back. Add marks on where each piece connects, and be sure to label the top and bottom of each piece with “T” for Top and “B,” for Bottom.
It’s easy to get turned around when sewing a plus size corset. It’s critical to be thorough and take your time with your markings.
Here’s a list, to remind you:
- Number each piece, starting from CF to CB
- Mark “T” for “Top” and “B” for “Bottom”
- Mark connection points for each piece
- Mark grainlines
- Mark where boning is
This makes cutting the canvas and fabric much easier!
Step 3: Cut Canvas Fabric, using Muslin Pieces as Pattern
The canvas adds shape to the corset, and makes it less stretchy – providing a tight and curve hugging fit.
Take your pattern pieces (in muslin) and cut canvas pieces, transferring all marks to the canvas.
Here’s that marking list, to remind you:
- Number each piece, starting from CF to CB
- Mark “T” for “Top” and “B” for “Bottom”
- Mark connection points for each piece
- Mark grain lines
- Mark where boning is
Step 4: Sew Ends of Rigilene Plastic Boning
Next, it’s time to plan where to place boning for the plus size corset. I took my plastic boning – the same used on the toile, and I padded the edges with muslin. You have to “cap off” the edges, because it’s serrated plastic and will rip through your corset!
I then sewed the plastic Rigilene plastic boning (on both sides) to the canvas. You an definitely use spiral steel boning with caps, but I’m on a time crunch!
I did use spiral steel boning at the center back!
Step 5: Cut Outer Fabric or “Fashion Fabric”
At this point, we have cut a lot of cream and white pieces – and now it’s time to cut our “fashion fabric” that will be on the outside of the plus size corset.
I used a green satin for my exterior fabric. I’ve used brocades in the past, but I find they disintegrate quickly!
After you’ve cut your outer fabric, you’ll “flat line” your exterior fabric to the canvas, stitching 1/4″ inch from the edge.
At this point, double check to make sure the markings on the canvas are visible [not too light!].
Step 6: Cut Lining for Plus Size Corset
Now, cut the lining (using the original muslin pattern!!) and sew it together. The lining is the interior fabric that goes against your skin!
i got navy blue lining from JoAnn fabrics.
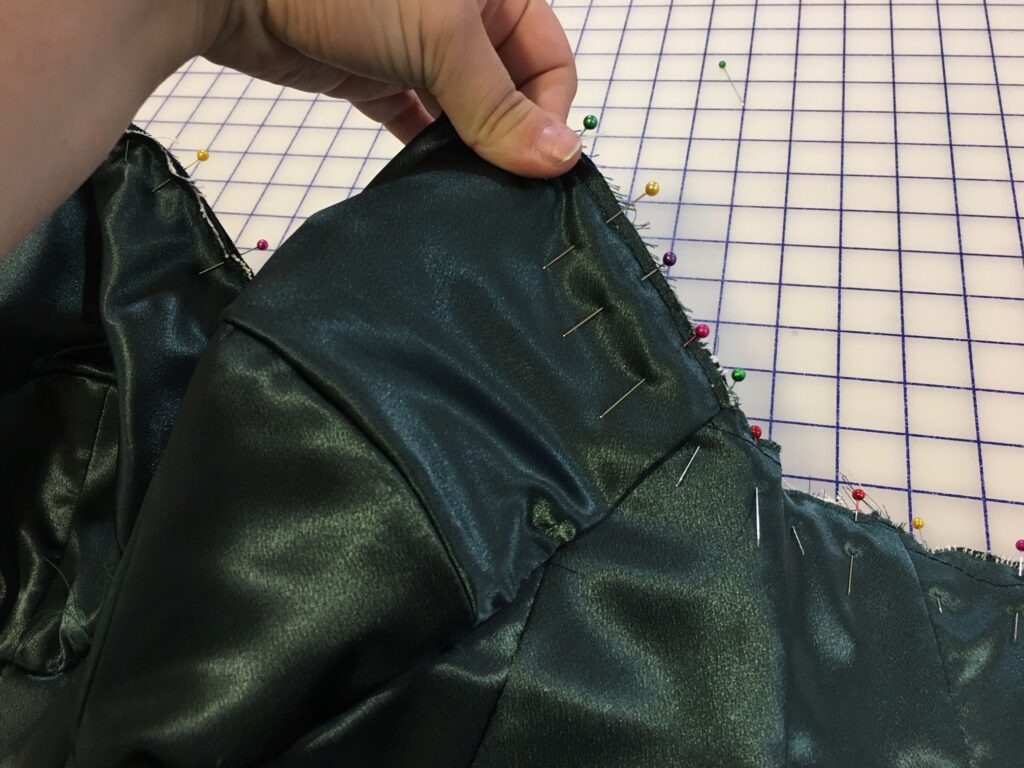
Step 7: Join Lining and Fabric at Center Back
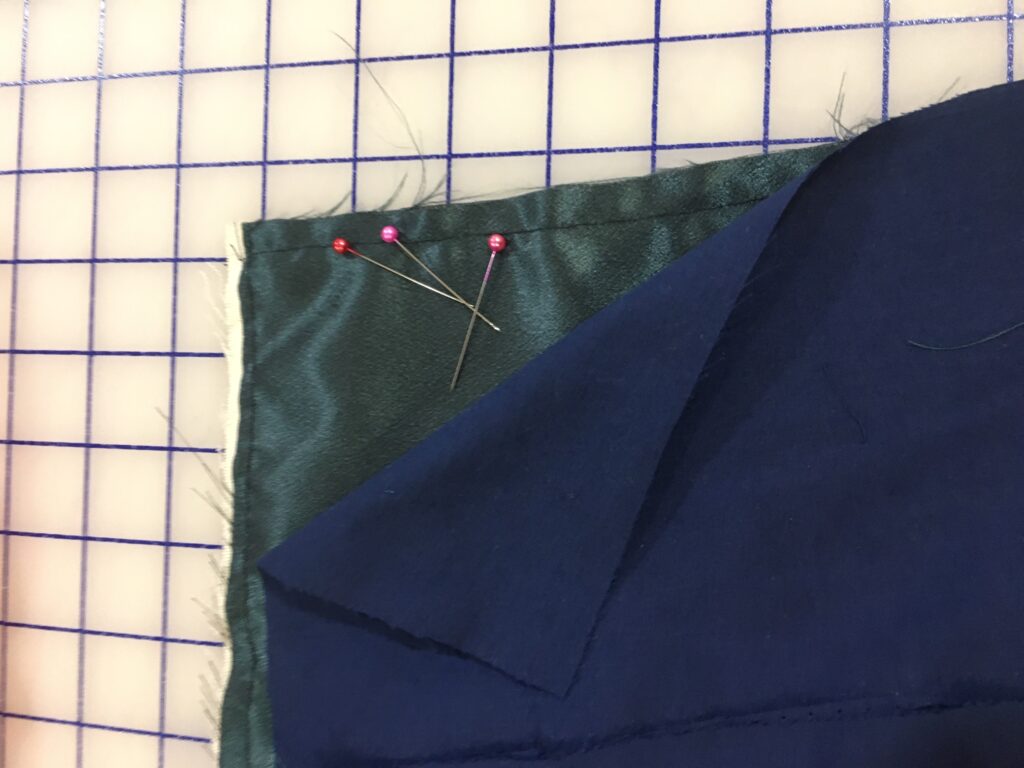
The next step is to join the lining and outer fabric (attached to the canvas) together along the center back, sewing at 5/8″.
This is also where you’ll “true out” the cut lines, making sure all the layers are even.
Step 8: Insert Spiral Steel Boning for the Plus Size Corset
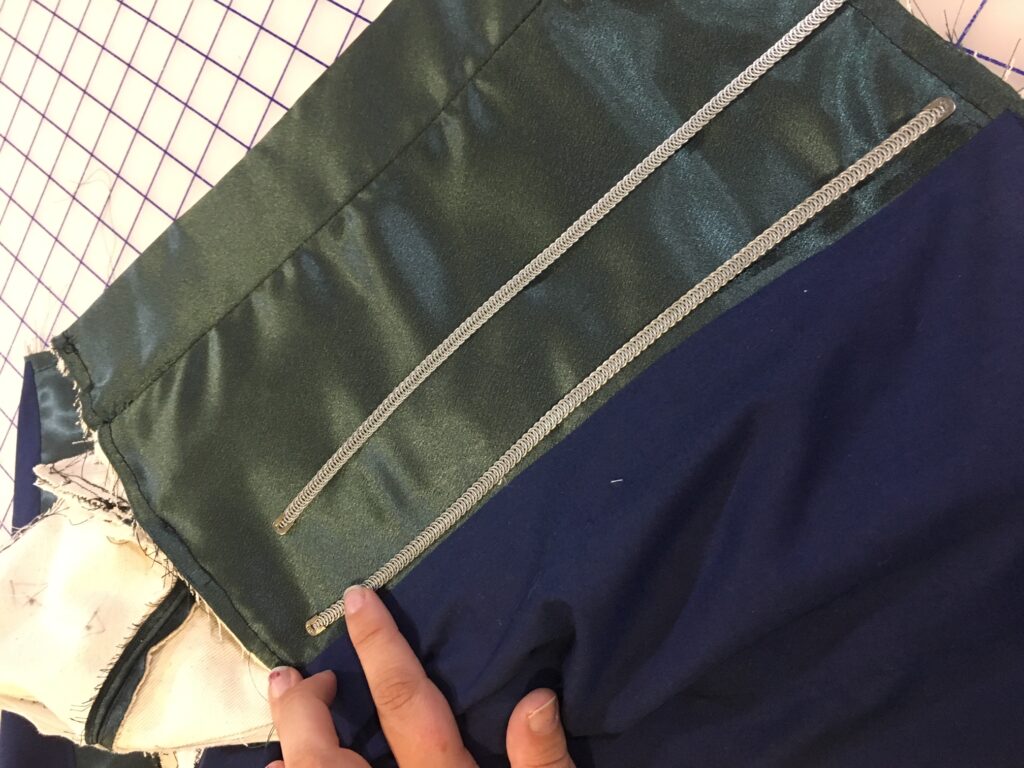
I then created a casing for the spiral steel boning at center back, by sewing 3/8″ over from the 5/8″ line we sewed at Center Back in Step #7.
I worked the steel boning down, making so there’s about 3/4″ room at the top and bottom. (I used an 11″ long spiral steel bones, and you’ll need to configure how long to make yours!)
Step 9: Finish Sewing Lining for the Plus Size Corset
Now that that’s done, you’ll sew the edges of the lining to the outer layers along the top and bottom of the corset.
Make sure to match the pieces and seam lines up, for example, making sure piece 4 of the fashion fabric and piece 4 of the lining match up!
Step 10: Cut Binding for the Plus Size Corset
We’re almost to the end! Our next step is to cut strips of fabric to make binding, to finish the edges of the corset.
To make the binding, I cut diagonal strips [90 degrees from the cross grain]. Strips should be 1.5″ wide, on the bias.
I recommend marking all of the rows of your strips before cutting it’s much easier this way.
[If this part is confusing, I would look up a tutorial on making “binding”!]

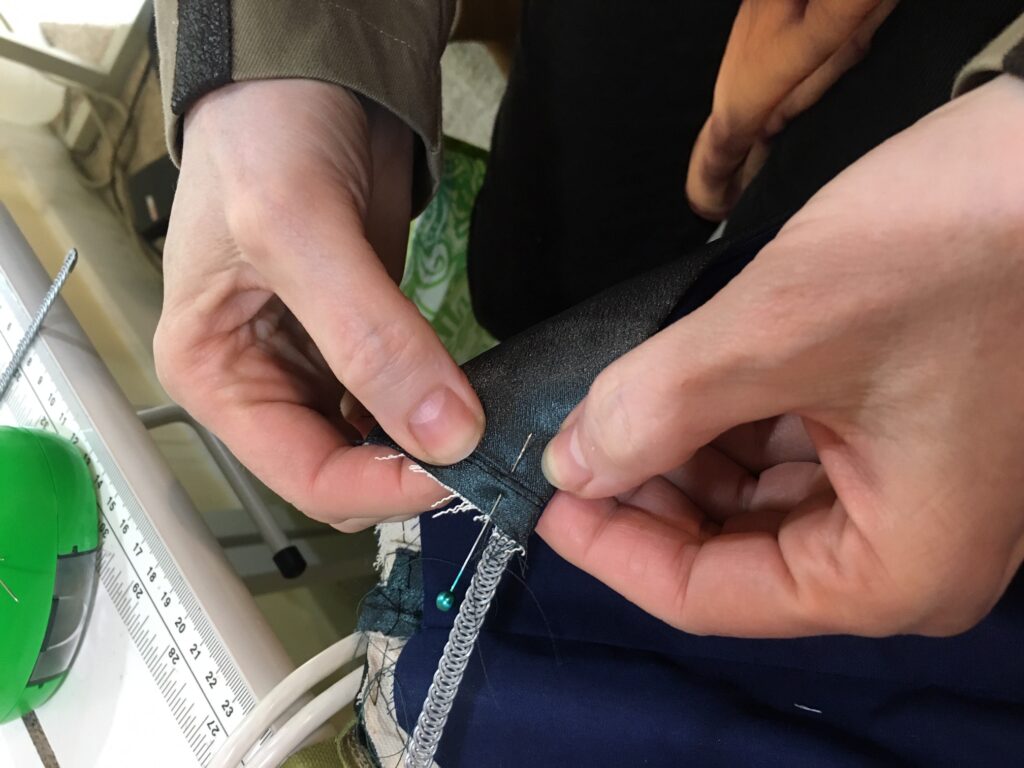
Step 11: Sew Binding on the Plus Size Corset
Now, you’ll pin the binding to the edges of the corset at 1/4″. Then after one side is attached, fold the binding over the edge, and add another fold to match it the stitch line.
From here, you can hand sew, or sew along the first line to attach the binding.

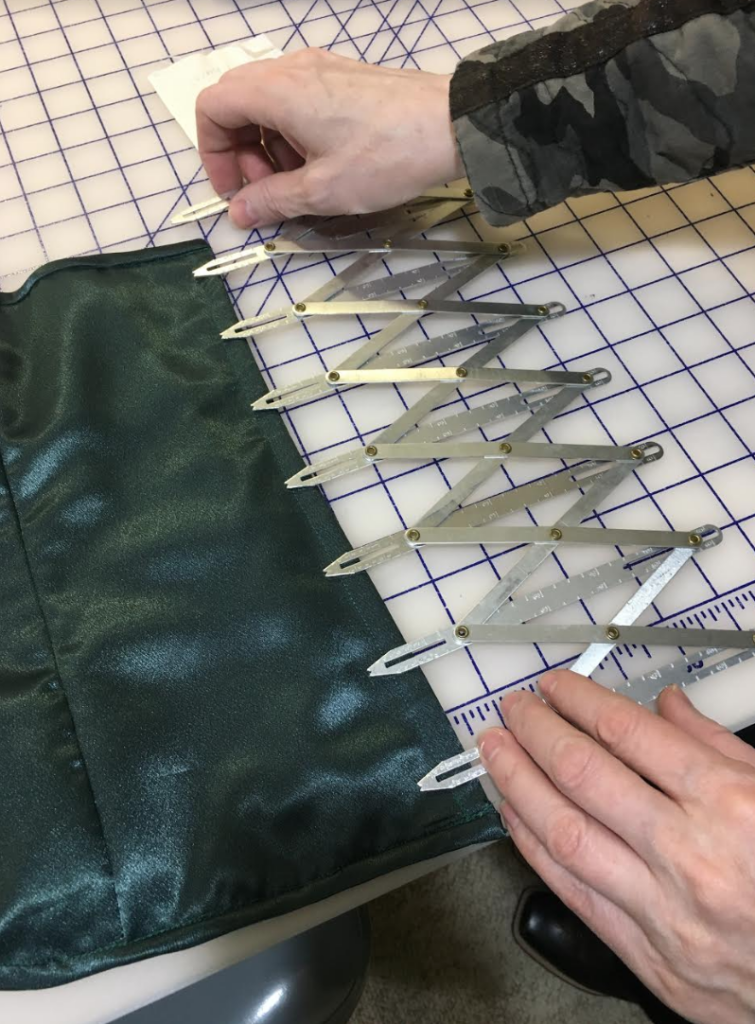
Step 12: Spacing of Grommets
We use this handy dandy tool (flexible sewing gauge) to place grommets, always having an odd number of grommets. I use pins to mark the placements.
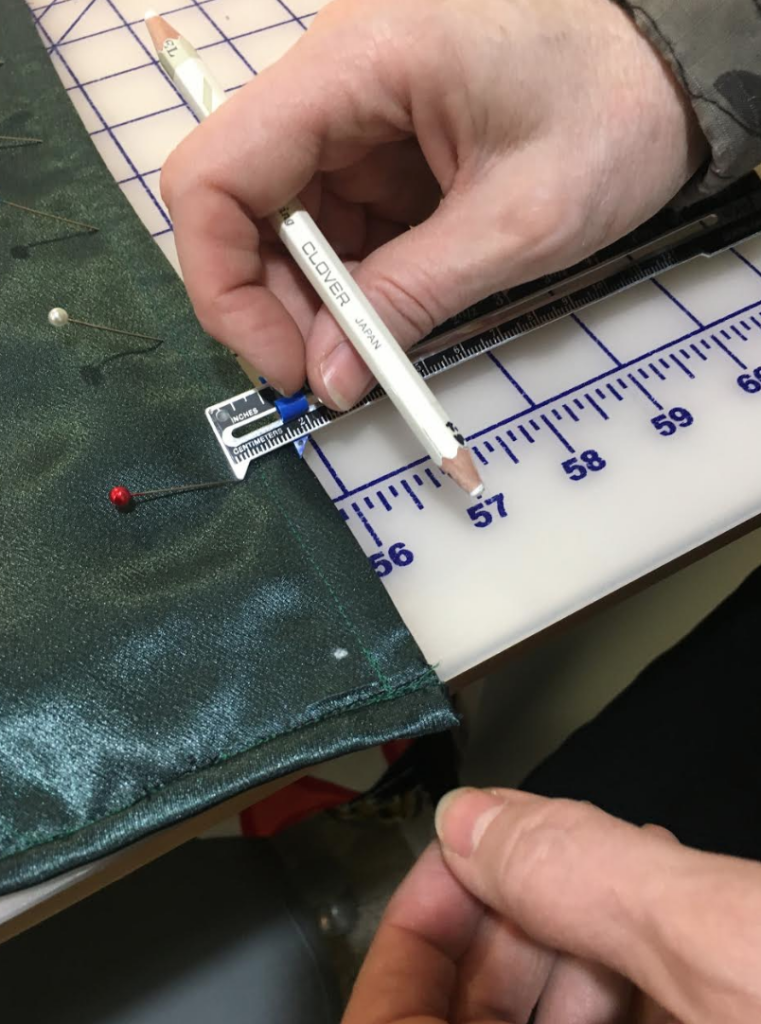
Step 12: Marking Grommets
We need to add grommets to lace up the corset, but we have to measure first! I place the grommet, using a sewing gauge to measure from the center of the placed grommet. (Measuring from center back.)
I use a water soluble white marking pencil. You should double check your measurements a few times, and use a little liquid to take off a mistake if needed.
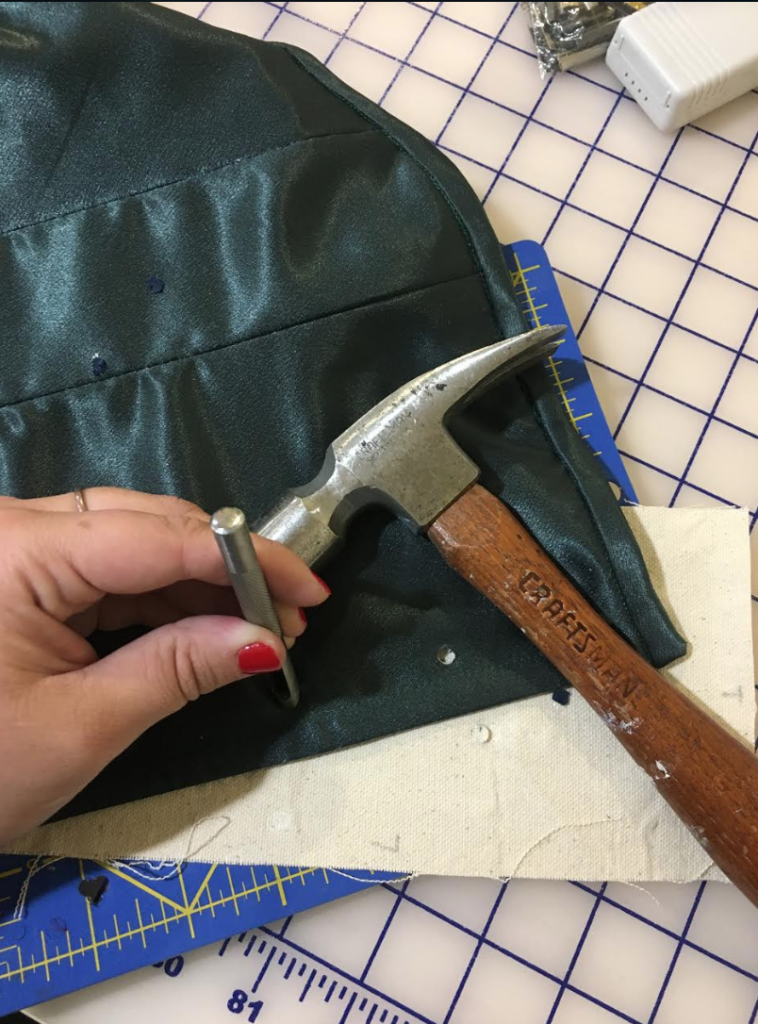
Step 13: Punching Holes in the Plus Size Corset
From here, I punch holes where the white pencil marks are. I use a grommet hole punching kit, and hammer through the layers.
I have a small cutting board underneath the corset, because I don’t want to make holes in my cutting table!
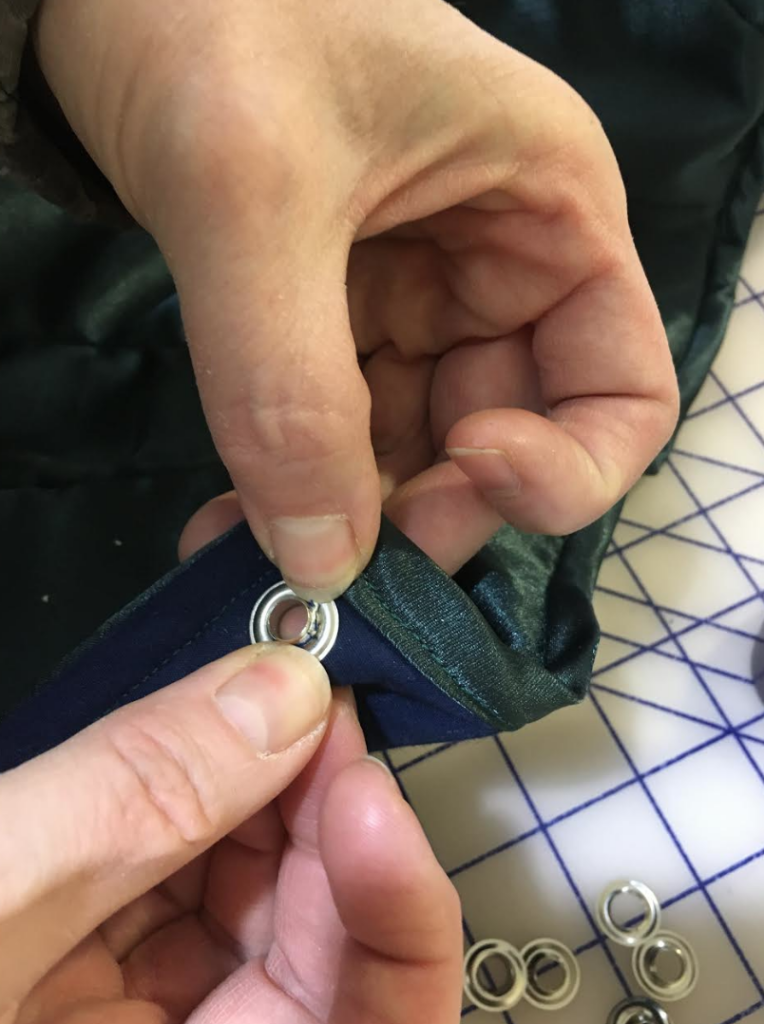
Step 14: Adding Grommets
Next step is to add grommets, using a handy tool. I use a machine that stands by itself on the table, not one where you have to use your hands – you may hurt yourself!
You’ll want to test which side is “right side up” with grommets, because I always guess wrong first. Grab some muslin, and do a quick test.
Then, use your grommet tool to secure your grommets.
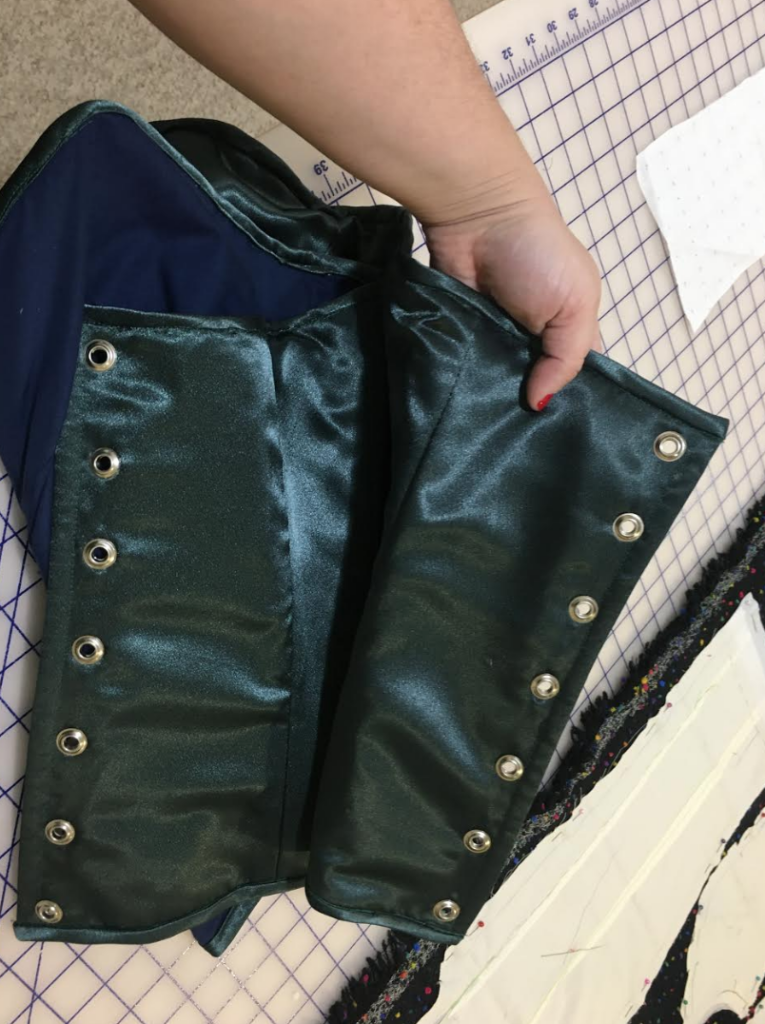
Step 15: Now, You’re [Almost] Done!
Measure out your cotton (non-stretch) corset lacing, and you’re done!
Some folks will use their fashion fabric backed with binding for their corset laces, and I prefer to just purchase lacing [like this].
This blog post was all about how to sew a plus size corset.
What to read next —>
Here are a few other plus size sewing blog posts to read next:
- 21 Tips for Sewing Your Own Clothes
- Online Sewing & Patterning Class – Review
- 11 Tips for Organizing My Fashion Studio
- 7+ Black Owned Sewing Pattern Companies
- How to Start Your Own Plus Size Fashion Brand – 7 Top Challenges
Want More Plus Size Sewing Resources?
Do you want to learn how to make plus size clothes? Check out this post on my favorite online sewing course! I also found THIS CLASS on corset making and sewing, but it isn’t plus size specific. Thought I’d share the resource [I haven’t taken this class, but I love the other class I have taken from Craftsy.]
And, of course, the best way to stay in touch is to subscribe to The Huntswoman email list!


